You've heard of it, and you've asked for it, now presenting the infamous Cactus to Clouds Hiking Trail!
Let me start off by being very clear! This is definitely a big kid hike. DO NOT ATTEMPT unless you are in good shape and have taken the correct safety precautions. In fact, this gives me an idea, keep your eyes peeled for posts in the near future about gear and what I've learned about hiking properly.
Now...lets get to it. I unfortunately did not get as many pictures as I had hoped, especially considering it was such a long hike. Turned out the first half I didn't want to slow the group down by stopping every five minutes, and the second half I was so focused on just getting one foot in front of the other that I didn't want to stop and take pictures. So, I will be using my GPS track on Google Earth, Caltopo, and my GPS software for the elevation plots.
OVERVIEW:

If you haven't heard, this hike takes you from downtown Palm Springs to the peak of San Jacinto. According to my GPS Tracks the overall length of the hike is 18.4 miles with 11,232 feet of total elevation gain. The net gain takes you from about 500 feet to about 10,800 feet. From what other bloggers say its the greatest elevation gain you can make in one day in the lower 48 states. Not sure where to find the data on that, or what hikes in Alaska or Hawaii would be larger/accessible, but I do know that hiking up 10,300 feet in one day is HUGE.

The hike is a combination of three separate trails. The last two are always the same: Skyline Trail to San Jacinto Peak Trail. Now to access the Skyline Trail there are two routes people commonly take: the Museum Trail (more popular for some reason), or the North Lykken Trial (I'll tell you why this one makes much more sense later).
 We started the hike at 4:00am, got to the tram area around 11am, made it to the peak around 2pm, and were able to take the 5:15pm tram back to the bottom. Over the 13hrs and 18.4 miles you average about 14.5% grade, which doesn't sound too bad until someone tells you that the hike starts out smoothly enough, but turns hideously steep at the end of the Skyline Trail, and goes on forever, for-ev-er, during the Peak Trail.
Keep an eye on the images, I've posted popular spots for reference in each image.
Let's get started.
START

As mentioned earlier there are two popular places to start. Obviously, from the pics, we started from the North Lykken Trail at 4:00am. The North Lykken Trail starts from the western end of Ramon Road. On the other hand, the Museum Trail starts from behind the Palm Springs Museum, and for some reason this is the preferred trail for novices and the experienced alike.
 Now both trails intersect at the trail head for the Skyline Trail....so why choose the North Lykken Trail? I'm so glad you asked! Well first off, the Museum Trail is steeper definitely steeper than the North Lykken Trail. Clocking in at grades over 20%, you're going to expend more energy than during the 15% grades of North Lykken. At about 0.75 miles, the Museum Trail isn't much shorter than the 1 mile North Lykken.
 More importantly, the Museum Trail is a labyrinth of crossing trails that make it very difficult to follow any one. Regulars seem to tote that as long as you're going up, you're going the right way until you hit the benches. But why go through all that at 4:00am, when you can only see 5 feet in front of you? The North Lykken trail is infinitely easier to follow with only a headlamp. Finally, if you look at the aerial topo, the North Lykken ends right at the Skyline trail head, where as the Museum Trail takes you to some benches, and you still have to hike a small hill to get to Skyline.
Alright now...our experience? I found out that I love hiking in the dark, but as you can see we took a little detour once we got to the end of the North Lykken Trail. Rather than turning left at this huge pile of rocks at the end of North Lykken, we went right and subsequently downhill to the benches. Pretty much went like this..."I don't remember going down hill (I've done the trail before)....wait are those benches?? Sorry guys, turn it around..."

Then I found time to take this picture...I love that you can see the shadow in my headlamp of me taking the picture.
SKYLINE TRAIL SECTION
In the blue corner, the Skyline Trail coming in at almost 7 miles and an 18% average grade, this is the part of the hike you'll want to write home about and drink to forget. I'm going to call this one "A Tale of Two Hikes". The first 5.5 miles are almost an exact copy of the North Lykken Trail. With a smooth incline of 15% grade, albeit much longer, you'll be feeling great about yourself. But then you realize this hike has an average grade of 18% over 7 miles, and you're almost done, mile wise. The last 2-2.5 mile climb goes relentlessly up and up with an average grade of 30%! That's not even the worst of it! The last 0.25 mile of the trail finds you unforgivable for your treachery and slaps you in the face with a 50% grade!! Mother have mercy!
So let's get to it.

 If you look at the topo, the majority of the Skyline Trail stays in the green, but there are two very distinct parts of the trail: before Flat Rock and after Flat Rock. Flat Rock being a big slab of exposed rock at around 5900 feet. It's tough to miss, but if you're not paying attention you can just walk right over it. Knowing the trail gets tougher after Flat Rock I convinced the group to take a 15 min break here to eat some food and gather some energy. I mean... we had been walking for pretty much 5 hrs straight.
The section before Flat Rock did have a few hills, and at one point we started heading downhill to our dismay, knowing we'd have to get that elevation back in the future. Right around the time you get to Flat Rock you get a clear view of Coffman's Crag. Coffman's Crag is a huge rock on the side of San Jacinto that sits just below Grubb's Notch, where the Skyline Trail ends.
 Once you get passed Flat Rock you reach the Manzanita section of the hike. Now it feels like you in a mountain area! If you miss Flat Rock you'll instantly know due to the dramatic change in the grade of the hike. Where the first section of Skyline stayed in the green on the topo and never really gets too perpendicular to the contour lines, the top section does the exact opposite. Mired by red grades on the topo and pretty much perpendicular to the contour lines the whole time (except during the traverse) the last part is much tougher.
Honestly, this is probably why most people claim it to be one of the toughest day hikes in the country. It's very long, and instead of getting easier as you rack up miles, it gets significantly harder. Of course the people I went with planned on climbing the mountaineer's route to Whitney the next week, so they bounded up this last section no problem, while I began to count my steps.


Here are my elevation plots of the Skyline Trail Section:


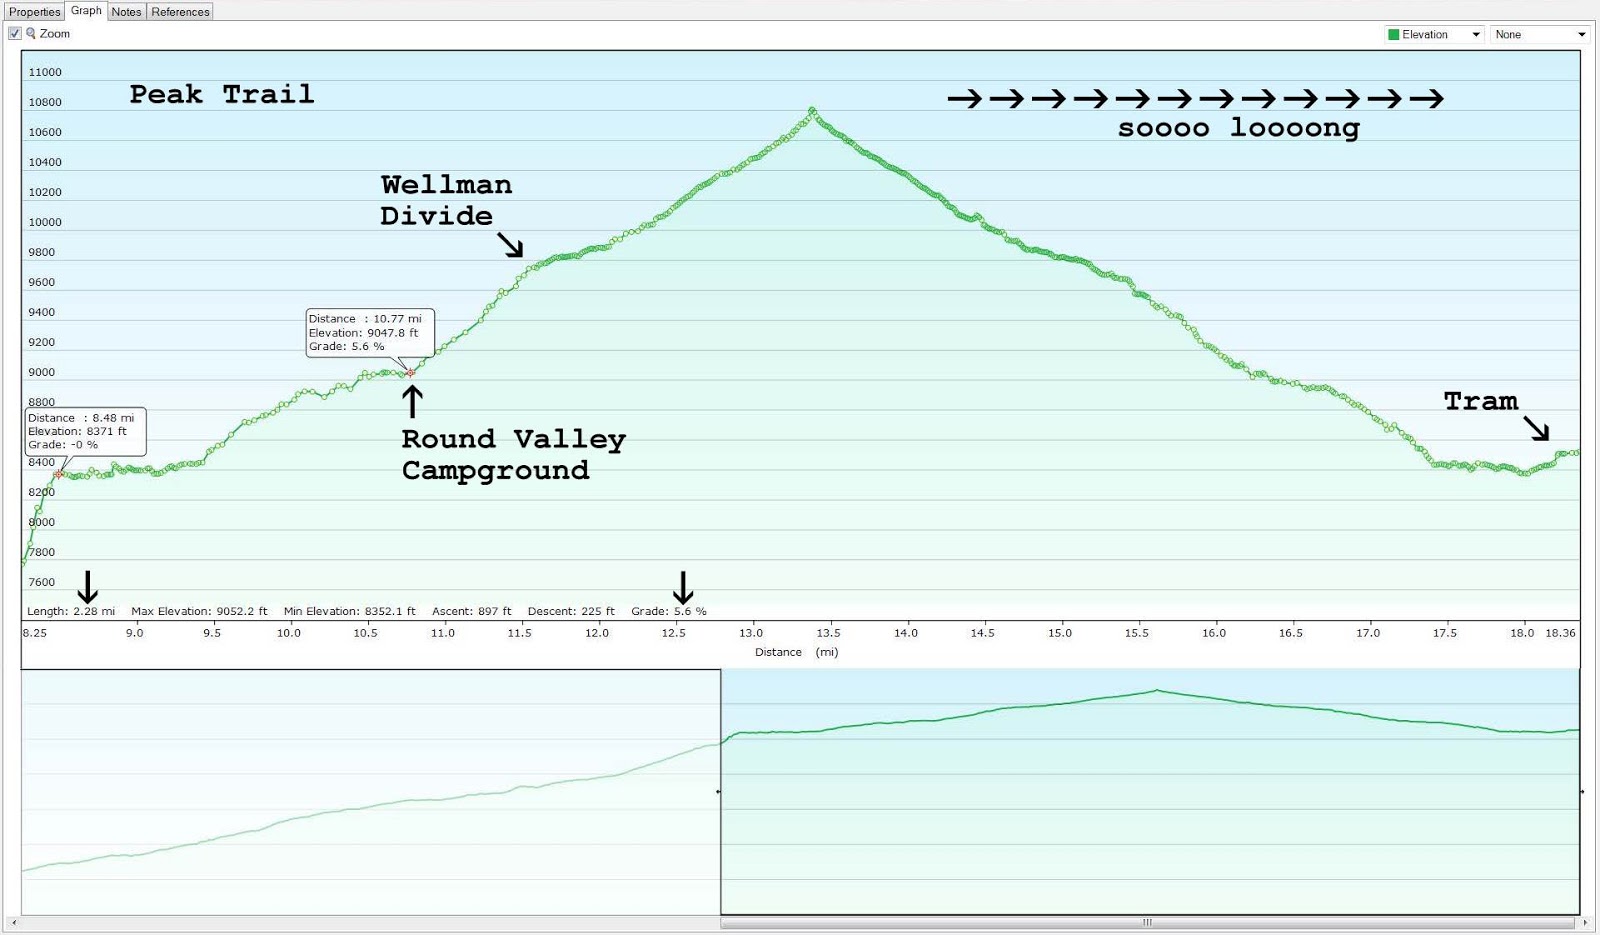
SAN JACINTO PEAK TRAIL


WEATHER
The weather was a bit out of the ordinary and worth a discussion. This trail being such a huge elevation difference definitely brings seasons into the mix. Don't do it over summer. The desert valley will hit 110+, and there's no way you'll be high enough elevation to avoid the heat. Be careful in the winter, and be prepared for if the peak has snow. The best time to do it is the fall before any big snow hits the mountain. The second best time is in the spring.
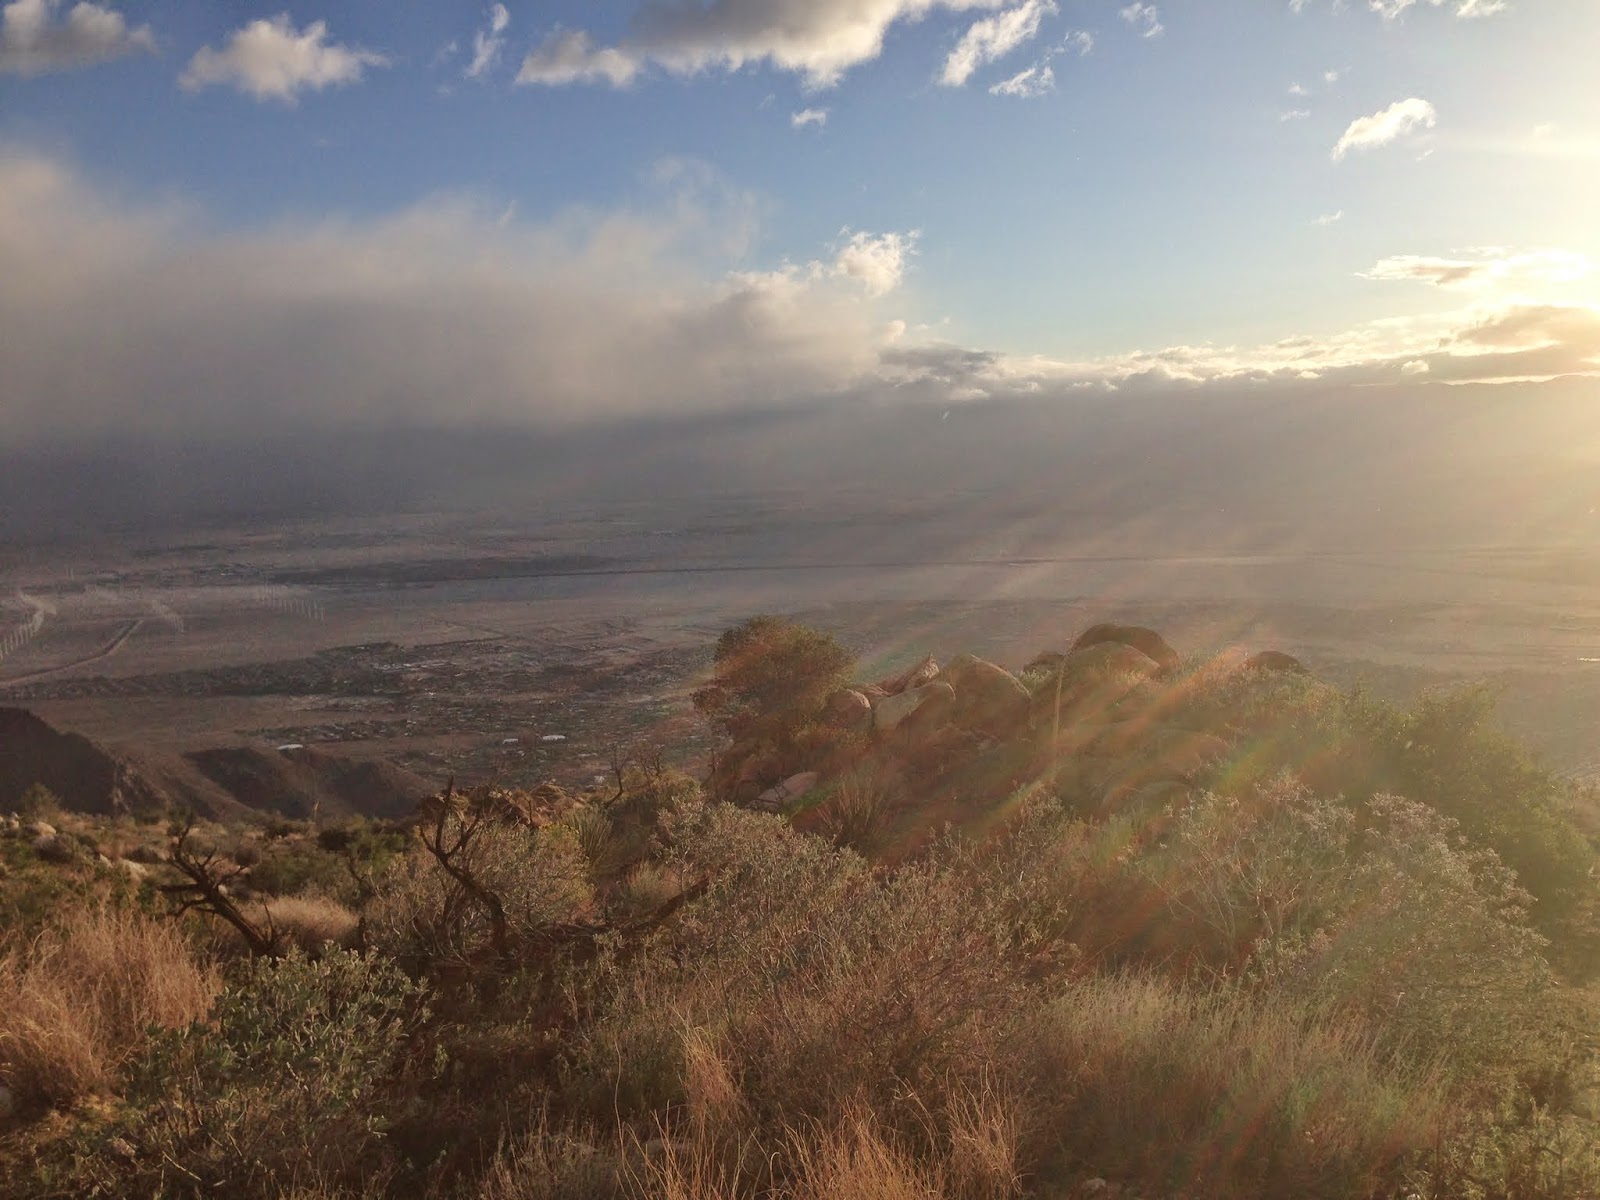
Why second best? Well, we did the hike in the spring and it just so happened that it snowed the night before we started. The rain stopped at the base around 3 am, and we got started around 4 am. Now, we payed attention to the weather so we knew it was coming and were prepared, but on our way up we ran into a group coming down who had started earlier that us and got rained on for most of their hike. They took a look at the snow at the peak and decided to head back to the bottom to dry off.
We didn't hit too much weather, even at higher elevations we only hit a few patches of sleet, but nothing stuck. The clouds at the peak dissipated as we got closer and we never really had anything too thick above us. There, however was snow on the ground starting around 7000 feet. Thank goodness for waterproof boots because it got deep and slushy as we got to the more used trails of the San Jacinto Peak Trail.
ADVICE
So, I know the real reason you came here wasn't to listen to me ramble, you want to know what people who have done the hike recommend. Well here ya go.
1. Train - Absolutely be physically prepared for 13 hours of walking. One thing I noticed was carrying a pack for that long puts tremendous stain on your trapezius ("traps"...had to look it up) muscle and whenever I lifted the back to relieve my neck my lower back would compress. I recommend getting out on a 15-16 mile hike, doesn't have to be a huge elevation gain, but you just need to be prepared to walk for that long. Obviously I agree that you should also do at least one hike with an elevation gain of 4000-5000 feet to get used to the ascent.
2. Bring plenty of water and food. I went through a gallon of water myself without using the bathroom. If you're only Skyline, you'll probably be alright with a half gallon so long as you don't get lost. Bring plenty of food, you will be in a bit of a time crunch if doing to the whole thing and you want to get back to the tram before dark, but you'll need the calories. I brought 4 energy gels, 8 cliff bars, 4 Honey Stinger Waffles (so delicious), a bag of nuts, a bag of dried fruit, and some salt tabs. I ate pretty much all my food, and a salt tab. Wish I had a peanut butter and honey sandwich though!
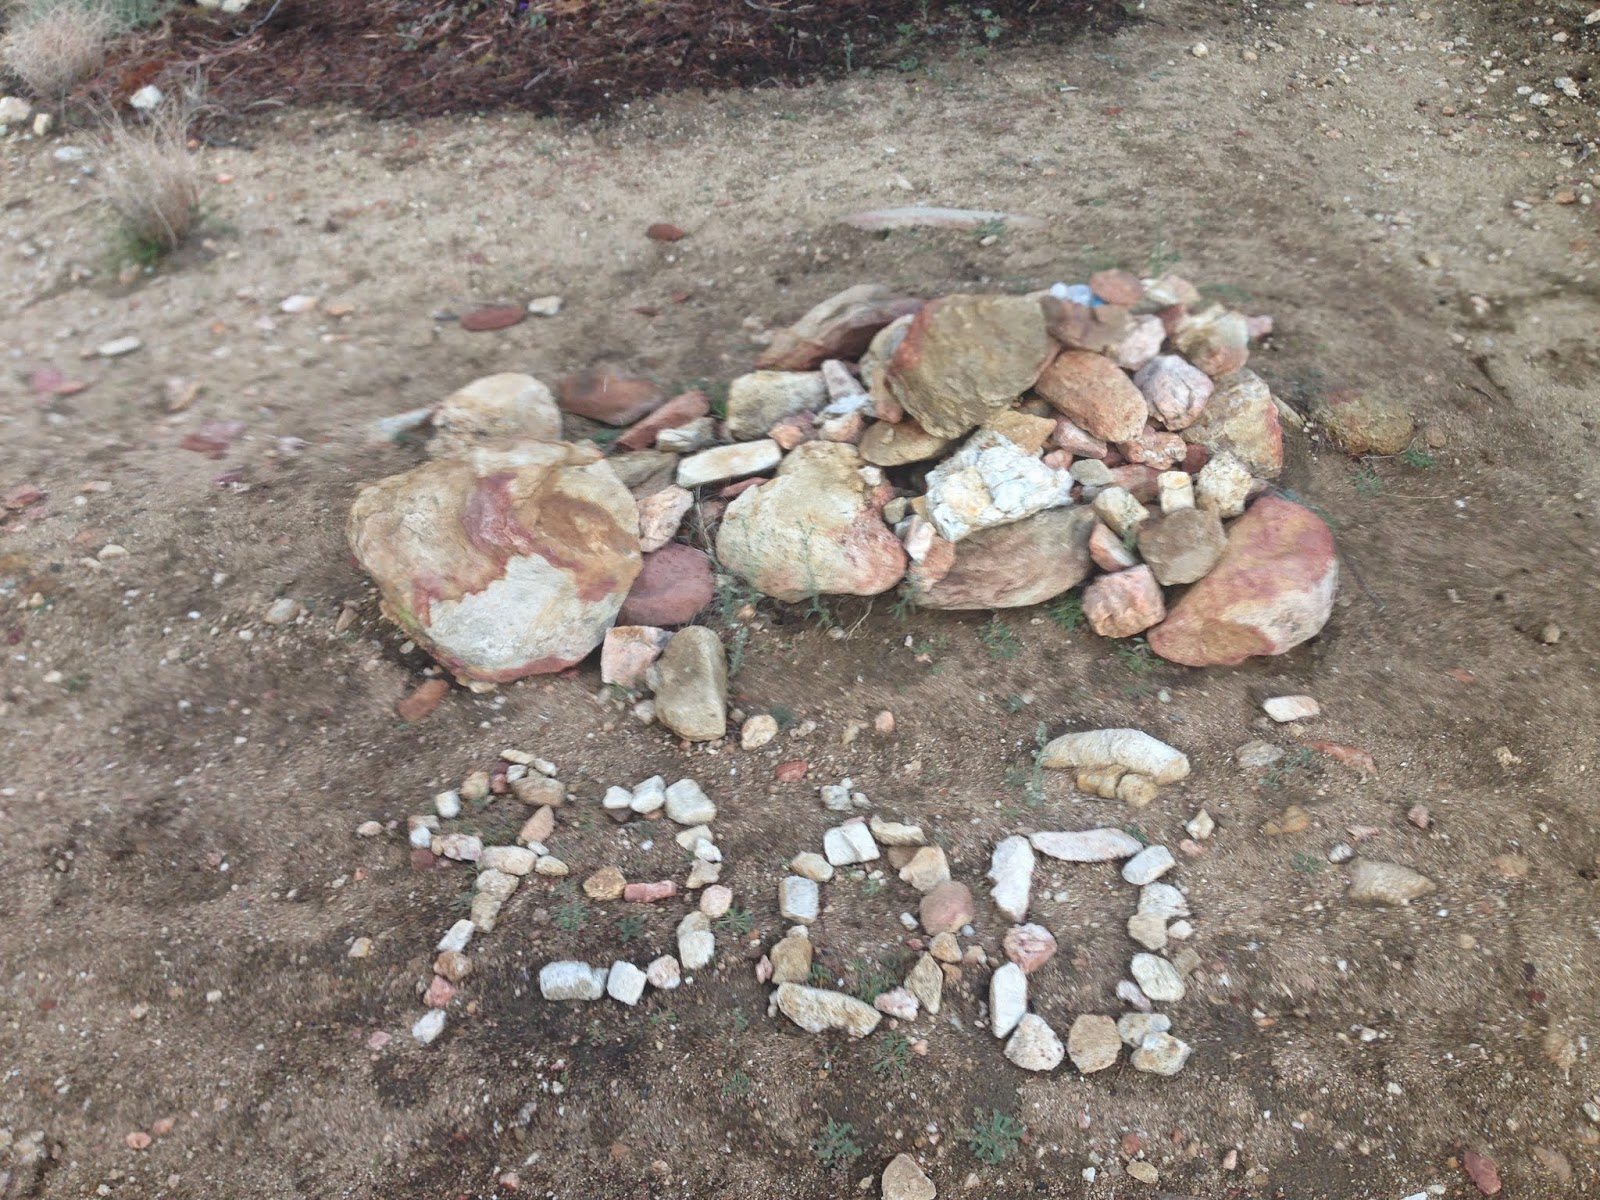
3. Bring a map. I uploaded three different tracks to my GPS of the Skyline Trail. If not for those we would have definitely gone off trail a few different times (once in the dark). The trail is pretty warn in, but there are sections where the trail forks and if you're not paying attention to the small barrier of rocks that a generous experience hiker placed on the ground in front of the wrong trail, you can definitely get lost. Rule: those rocks are on the ground for a reason, don't step over them.
4. Trekking Poles. Maybe it's just me, but having a little of the pressure taken off my knees and lower core was a godsend. Being able to lean on the poles during the ascent also provides much needed relief on those hip flexors. Not only that, but it was nice to be able to keep my hands busy the whole hike.
5. Watch the weather and bring appropriate clothes. If there is snow at the top, bring waterproof shoes. I also think it's a good idea to bring crampons and and ice ax if you have them. I wouldn't go out and buy them just for this hike, but if things get slick, tread slowly.
6. Follow other hiking protocol (make sure someone knows your out there, pack out what you pack in..etc)
7. Good luck and have fun!
As for me, I'd definitely hike the Skyline Trail multiple times. But it'll take a lot of beer to convince me to trek the whole Cactus to Clouds again.
Most importantly, keep calm and hike on.
More Pics!